each day a little more while working with LangGraph.
Let’s face it: since LangChain is one of the first frameworks to handle the integration with LLMs, it took off earlier and became kind of a go-to option when it comes to building production-ready agents, whether you like it or not.
LangChain’s younger brother is LangGraph. This framework uses a graph notation with nodes and edges to build the applications, making them highly customizable and very robust. That is what I am enjoying so much.
At first, some notations felt strange to me (maybe it’s just me!). But I kept digging and learning more. And I strongly believe we learn better while we’re implementing stuff, because that’s when the real problems pop up. So, after a few lines of code and some hours of code debugging, that graph architecture started to make much more sense to me, and I started to enjoy creating things with LangGraph.
Anyway, if you don’t have any introduction to the framework, I recommend you look at this post [1].
Now, let’s learn more about the project of this article.
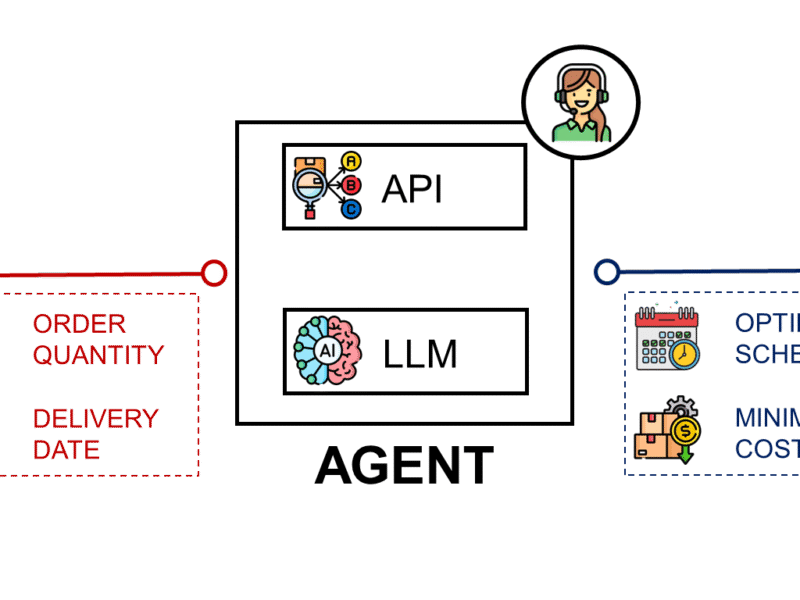
The Project
In this project, we are going to build a multi-step agent:
- It takes in a machine learning model type: classification or regression.
- And we will also input the metrics of our model, such as accuracy, RMSE, confusion matrix, ROC, etc. The more we provide to the agent, the better the response.
The agent, equipped with Google Gemini 2.0 Flash:
- Reads the input
- Evaluate the model’s metric inputted by the user
- Return an actionable list of suggestions to tune the model and improve its performance.
This is the project folder structure:
ml-model-tuning/
├── langgraph_agent/
│ ├── graph.py #LangGraph logic
│ ├── nodes.py #LLMs and tools
├── main.py # Streamlit interface to run the agent
├── requirements.txt
The Agent is live and deployed in this web app.
Dataset
The dataset to be used is a very simple toy dataset named Tips, from the Seaborn package, and open-sourced under the license BSD 3. I decided to use a simple dataset like this because it has both categorical and numerical features, being suited for both types of model creation. In addition, the start of the article is the agent, so that is where we want to spend more attention.
To load the data, use the following code.
import seaborn as sns

# Data
df = sns.load_dataset('tips')
Next, we will build the nodes.
Nodes
The nodes of a LangGraph object are Python functions. They can be tools that the agent will use or an instance of an LLM. We build each node as a separate function.
But first, we have to load the modules.
import os
from textwrap import dedent
from dotenv import load_dotenv
load_dotenv()

import streamlit as st
from langchain_google_genai import ChatGoogleGenerativeAI
from langchain_core.prompts import ChatPromptTemplate, MessagesPlaceholder
Our first node is the one to get the model type. It simply gets the input from the user on whether the model to be enhanced is a regression or a classification.
def get_model_type(state):
    """Check if the user is implementing a classification or regression model. """

    # Define the model type
    modeltype = st.text_input("Please let me know the type of model you are working on and hit Enter:",
                              placeholder="(C)lassification or (R)egression",
                              help="C for Classification or R for Regression")

    # Check if the model type is valid
    if modeltype.lower() not in ["c", "r", "classification", "regression"]:
        st.info("Please enter a valid model type: C for (C)lassification or R for (R)egression.")
        st.stop()

    if modeltype.lower() in ["c", "classification"]:
        modeltype = "classification"
    elif modeltype.lower() in ["r", "regression"]:
        modeltype = "regression"

    return {"model_type": modeltype.lower()} # "classification" or "regression"
The other two nodes from this graph are almost the same, but they differ in the system prompt. One is optimized for regression models evaluation, while the other is specialized in classification. I will paste only one of them here. The complete code is available on GitHub, though. See all the nodes’ code here.
def llm_node_regression(state):
    """
    Processes the user query and search results using the LLM and returns an answer.
    """
    llm = ChatGoogleGenerativeAI(
        model="gemini-2.5-flash",
        api_key=os.environ.get("GEMINI_API_KEY"),
        temperature=0.5,
        max_tokens=None,
        timeout=None,
        max_retries=2
    )

    # Create a prompt
    messages = ChatPromptTemplate.from_messages([
        ("system", dedent("""
                          You are a seasoned data scientist, specialized in regression models.
                          You have a deep understanding of regression models and their applications.
                          You will get the user's result for a regression model and your task is to build a summary of how to improve the model.
                          Use the context to answer the question.
                          Give me actionable suggestions in the form of bullet points.
                          Be concise and avoid unnecessary details.
                          If the question is not about regression, say 'Please input regression model metrics.'.

                          """)),
        MessagesPlaceholder(variable_name="messages"),
        ("user", state["metrics_to_tune"])
    ])

    # Create a chain
    chain = messages | llm
    response = chain.invoke(state)
    return {"final_answer": [response]}
Great. Now it is time to stick these nodes together by building the edges to connect them. In other words, building the flow of the information from the user input to the final output.
Graph
The file graph.py will be used to generate the LangGraph object. First, we need to import the modules.
from langgraph.graph import StateGraph, END
from typing_extensions import TypedDict
from langgraph.graph.message import add_messages
from langchain_core.messages import AnyMessage
from langgraph.graph import StateGraph, END
from typing import TypedDict, Annotated
from langgraph_agent.nodes import llm_node_classification, llm_node_regression, get_model_type
The next step is to create the state of the graph. StateGraph manages the agent’s state throughout the workflow. It keeps track of the information the agent has gathered and processed. It is nothing but a class with the names of the variables and their type written in dictionary style.
# Create a state graph
class AgentState(TypedDict):
    """
    Represents the state of our graph.

    Attributes:
        messages: A list of messages in the conversation, including user input and agent outputs.
        model_type: The type of model being used, either "classification" or "regression".
        question: The initial question from the user.
        final_answer: The final answer provided by the agent.
    """
    messages: Annotated[AnyMessage, add_messages] # accumulate messages
    model_type: str
    metrics_to_tune: str
    final_answer: str
To build the graph, we will use a function that:
- Adds each node with a tuple
("name", node_function_name) - Defines the starting point at the get_model_type node.
.set_entry_point("get_model_type") - Then, there is a conditional edge, that decides to go to the appropriate node depending on the response from the
get_model_typenode. - Finally, connect the LLM nodes to the
ENDstate. - Compile the graph to make it ready for use.
def build_graph():
    # Build the LangGraph flow
    builder = StateGraph(AgentState)

    # Add nodes
    builder.add_node("get_model_type", get_model_type)
    builder.add_node("classification", llm_node_classification)
    builder.add_node("regression", llm_node_regression)

    # Define edges and flow
    builder.set_entry_point("get_model_type")

    builder.add_conditional_edges(
        "get_model_type",
        lambda state: state["model_type"],
        {
            "classification": "classification",
            "regression": "regression"
        }
    )

    builder.add_edge("classification", END)
    builder.add_edge("regression", END)

    # Compile the graph
    return builder.compile()
If you want to see the graph, you can use this little snippet.
# Create the graph image and save png
from IPython.display import display, Image
graph = build_graph()
display(Image(graph.get_graph().draw_mermaid_png(output_file_path="graph.png")))It is a simple agent, but it works very well. We will get to that soon. But we need to build the front-end piece first.
Building the User Interface
The user interface is a Streamlit app. I have chosen this option due to easy prototyping and deployment features.
Let’s load the libraries needed once again.
import os
from langgraph_agent.graph import AgentState, build_graph
from textwrap import dedent
import streamlit as st
Configuring the page layout (title, icon, sidebar etc).
## Config page
st.set_page_config(page_title="ML Model Tuning Assistant",
                   page_icon='🤖',
                   layout="wide",
                   initial_sidebar_state="expanded")
Creating the sidebar that holds the field to add a Google Gemini API Key and the restart session button.
## SIDEBAR | Add a place to enter the API key
with st.sidebar:
    api_key = st.text_input("GOOGLE_API_KEY", type="password")

    # Save the API key to the environment variable
    if api_key:
        os.environ["GEMINI_API_KEY"] = api_key

    # Clear
    if st.button('Clear'):
        st.rerun()
Now, we add the page’s title and instructions to use the agent. This is all simple code using mostly the function st.write().
## Title and Instructions
if not api_key:
st.warning("Please enter your OpenAI API key in the sidebar.")
st.title('ML Model Tuning Assistant | 🤖')
st.caption('This AI Agent is will help you tuning your machine learning model.')
st.write(':red[**1**] | 👨💻 Add the metrics of your ML model to be tuned in the text box. The more metrics you add, the better.')
st.write(':red[**2**] | ℹ️ Inform the AI Agent what type of model you are working on.')
st.write(':red[**3**] | 🤖 The AI Agent will respond with suggestions on how to improve your model.')
st.divider()
# Get the user input
text = st.text_area('**👨💻 Add here the metrics of your ML model to be tuned:**')
st.divider()And, lastly, the code to:
- Run the
build_graph()function and create the agent. - Create the initial state of the agent, with an empty
messages. - Invoke the agent.
- Print the results on screen.
## Run the graph

# Spinner
with st.spinner("Gathering Tuning Suggestions...", show_time=True):
    from langgraph_agent.graph import build_graph
    agent = build_graph()

    # Create the initial state for the agent, with blank messages and the user input
    prompt = {
        "messages": [],
        "metrics_to_tune": text
    }

    # Invoke the agent
    result = agent.invoke(prompt)

    # Print the agent's response
    st.write('**🤖 Agent Response:**')
    st.write(result['final_answer'][0].content)
All created. It is time to put this AI Agent to work!
So, we will build some models and ask the agent for tuning suggestions.
Running the Agent
Well, as this is an agent that helps us with model tuning suggestions, we must have a model to tune.
Regression Model
We will try the regression model first. We can quickly build a simple model.
# Imports
import pandas as pd
import numpy as np
import seaborn as sns
from sklearn.pipeline import Pipeline
from feature_engine.encoding import OneHotEncoder
from sklearn.model_selection import train_test_split
from sklearn.linear_model import LinearRegression
from sklearn.metrics import root_mean_squared_error

## Baseline Model
# Data
df = sns.load_dataset('tips')

# Train Test Split
X = df.drop('tip', axis=1)
y = df['tip']
X_train, X_test, y_train, y_test = train_test_split(X, y, test_size=0.2, random_state=42)

# Categorical
cat_vars = df.select_dtypes(include=['object']).columns

# Pipeline
pipe = Pipeline([
    ('encoder', OneHotEncoder(variables=['sex', 'smoker', 'day', 'time'],
                              drop_last=True)),
    ('model', LinearRegression())
])

# Fit
pipe.fit(X_train, y_train)
Now, we have to gather metrics data to present to our AI Agent in order to get tuning suggestions. The more data, the better. As I am working with a regression model, I chose to present the following information:
- Feature names
- Statistical description of the dataset
- R²
- Root Mean Squared Error (RMSE)
- Regression intercept and coefficients
- VIF
        total_bill         tip   sex smoker  day    time        size
count   244.000000  244.000000   244    244  244     244  244.000000
unique         NaN         NaN     2      2    4       2         NaN
top            NaN         NaN  Male     No  Sat  Dinner         NaN
freq           NaN         NaN   157    151   87     176         NaN
mean     19.785943    2.998279   NaN    NaN  NaN     NaN    2.569672
std       8.902412    1.383638   NaN    NaN  NaN     NaN    0.951100
min       3.070000    1.000000   NaN    NaN  NaN     NaN    1.000000
25%      13.347500    2.000000   NaN    NaN  NaN     NaN    2.000000
50%      17.795000    2.900000   NaN    NaN  NaN     NaN    2.000000
75%      24.127500    3.562500   NaN    NaN  NaN     NaN    3.000000
max      50.810000   10.000000   NaN    NaN  NaN     NaN    6.000000

---
Model: Linear Regression
Score: 0.44
RMSE: 0.84
Intercept: 0.45

Coefficients:
       feature  coefficient
0   total_bill     0.094700
1         size     0.233484
2     sex_Male     0.028819
3    smoker_No     0.192353
4      day_Sat    -0.006064
5      day_Fri     0.179721
6      day_Sun     0.128928
7  time_Dinner    -0.094957

VIF:
total_bill    2.226294
tip           1.879238
size          1.590524
Now I will run the agent.

Here is the agent’s response:
🤖 Agent Response:
Here are actionable suggestions to improve your regression model:
- Explore non-linear relationships: Consider adding polynomial features for total_bill and size, or interaction terms between features (e.g., total_bill * size), as the current linear model might be too simplistic for the underlying data patterns.
- Evaluate alternative regression models: Given the R-squared of 0.44, test other models like Random Forest Regressor, Gradient Boosting Regressor, or Support Vector Regressor, which can capture more complex, non-linear relationships.
- Address data distribution and outliers: Investigate and handle outliers in total_bill and the target variable tip. Consider applying transformations (e.g., log transform) to skewed features to better meet linearity assumptions and improve model performance.
- Analyze feature statistical significance: Obtain p-values for each coefficient to identify features that may not be statistically significant. Removing or re-evaluating such features can simplify the model and potentially improve generalization.
There are a couple of suggestions here. We can now choose what we will accept or not. Here is what I tried (code in GitHub):
- I trained a Random Forest Regressor, but the result was not good with the out of the box model, dropping the R² to 0.25 and the RMSE to 0.97. So I discarded that option.
- So, if I am keeping the Linear Regression, another suggestion is to use log transformations and treat outliers. I tried that, and the result is better. The model goes to an R² of 0.55 and RMSE of 0.23. A significant improvement.
Classification Model
I followed the same drill here, but now working on a classification model, using the same dataset and trying to predict if the restaurant’s customer is a smoker or not.
- Trained a classification model
- Got the initial metrics:
Score = 0.69;RMSE = 0.55 - Ran the AI Agent for suggestions
- Applied some tuning suggestions:
class_weight='balanced'andBayesSearchCV. - Got the tuned metrics:
Score = 0.71;RMSE = 0.52

Notice how the Precision vs. Recall is more balanced as well.

Our job is complete. The agent is working as designed.
Before You Go
We have reached the end of this project. Overall, I am satisfied with the result. This project is quite simple and quick to build, and yet it delivers a lot of value!
Tuning models is not a one-size-fits-all action. There are many options to try. Thus, having the help of an AI Agent to give us a few ideas to try is very valuable and makes our job easier without replacing us.
Try the app for yourself and let me know if it helped you get an improved performance metric!
https://ml-tuning-assistant.streamlit.app
GitHub Repository
https://github.com/gurezende/ML-Tuning-Assistant
Find Me Online
References
[1. Building Your First AI Agent with LangGraph] https://medium.com/code-applied/building-your-first-ai-agent-with-langgraph-599a7bcf01cd?sk=a22e309c1e6e3602ae37ef28835ee843
[2. Using Gemini with LangGraph] https://python.langchain.com/docs/integrations/chat/google_generative_ai/
[3. LangGraph Docs] https://langchain-ai.github.io/langgraph/tutorials/get-started/1-build-basic-chatbot/
[4. Streamlit Docs] https://docs.streamlit.io/
[5. Get a Gemini API Key] https://tinyurl.com/gemini-api-key
[6. GitHub Repository ML Tuning Agent] https://github.com/gurezende/ML-Tuning-Assistant
[7. Guide to Hyperparameter Tuning with Bayesian Search] https://medium.com/code-applied/dont-guess-get-the-best-a-smart-guide-to-hyperparameter-tuning-with-bayesian-search-123e4e98e845?sk=ff4c378d816bca0c82988f0e8e1d2cdf
[8. Deployed App] https://ml-tuning-assistant.streamlit.app/